

20 Mar 2019 Optimise your MS outlook To Do Bar to Manage Tasks
Optimise your Microsoft Outlook “To Do Bar” to Manage your Tasks effectively
The Outlook “To Do Bar” offers some fantastic features to assist you in managing your Workload. The To Do Bar is is nestled on the right hand side of your Outlook Inbox. It is usually on by default, though many people tend to ignore it.

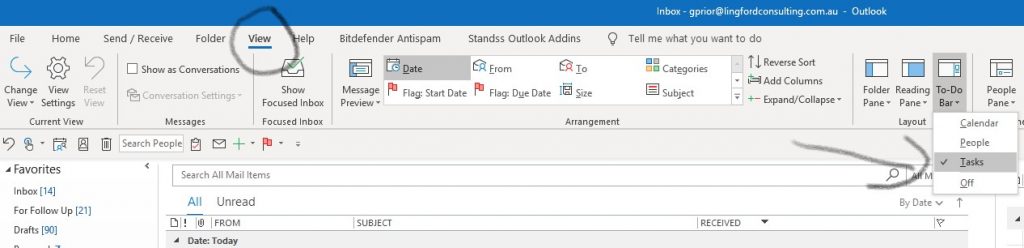
The Outlook “To Do Bar” includes a view of any emails you have flagged or any Tasks you have created. It appears on the RHS of your Inbox or Calendar screens as shown above.
If you cannot see your To Do Bar as above, then from either your Inbox or your Calendar views, go to View > To Do Bar and select Tasks. (See below)
With a bit of tweaking, your To Do Bar can become a powerful feature in MS Outlook that can help ensure you manage any email you flag for follow up or any Tasks you create. If you don’t use Outlook Tasks, see my article on how…
You can customise the settings of this list in many ways, but for this article, I want to show you how to:
- See your Due Date
- Group items by Due Date
Customise To Do Bar Columns
To show the Due Date, you need to right mouse-click on Arrange by by Flag: Due Date as shown below.
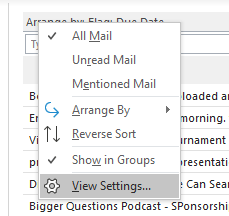
Open up View Settings to reveal the “Advanced View Settings: To Do List”. (Shown below)
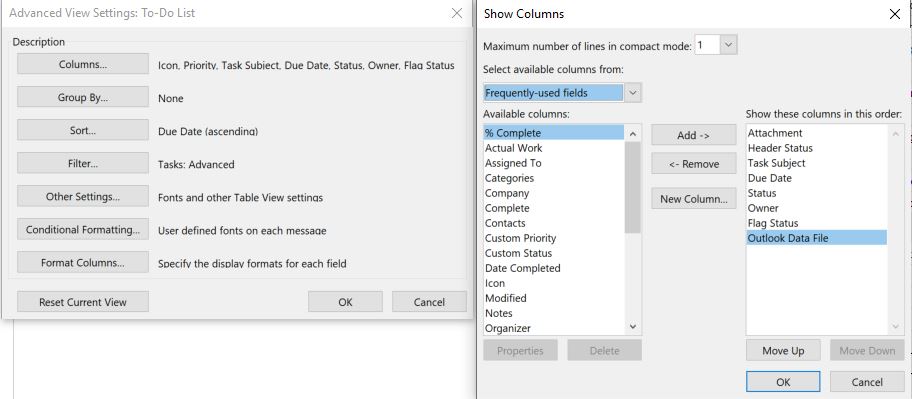
You will see there are two columns. The Column on the Left are all the “Available Columns” for your To Do Bar. The Column on the right are the ones in that view at the moment. (usually the default).
You can now use the “Add/Remove” buttons to select which Columns to show in your Customised To Do Bar. You have a myriad of options here, so feel free to experiment. But this article, I’m going to suggest you choose the following Columns:
- Icon
- Task Subject
- Due Date
You can now remove the unwanted Columns and use the “Move Up/Move Down” buttons to get them in the order I’ve suggested. Now click OK to return to the “Advanced View Settings: To Do List” dialog box.
Next, click on the “Group By…” box to open up the Group By Dialog Box.

Uncheck the”Automatically group according to arrangement” box as shown above, and then scroll down the “Group items by” list and select Due Date. It should default to Ascending. Now click OK to return to the “Advanced View Settings: To Do List” dialog box.
Finally, select the “Other Settings” box to make one small, but very important change.
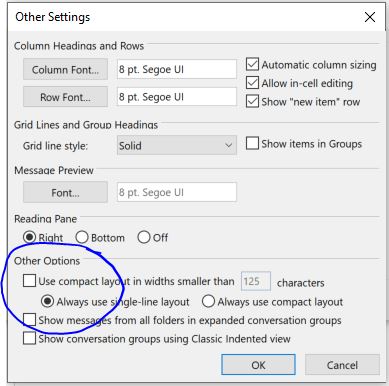
Under the “Other Options” section, uncheck the box that says; “Use compact layout in widths…..” This will then make the default; “Always use Single Line Layout” as displayed above.
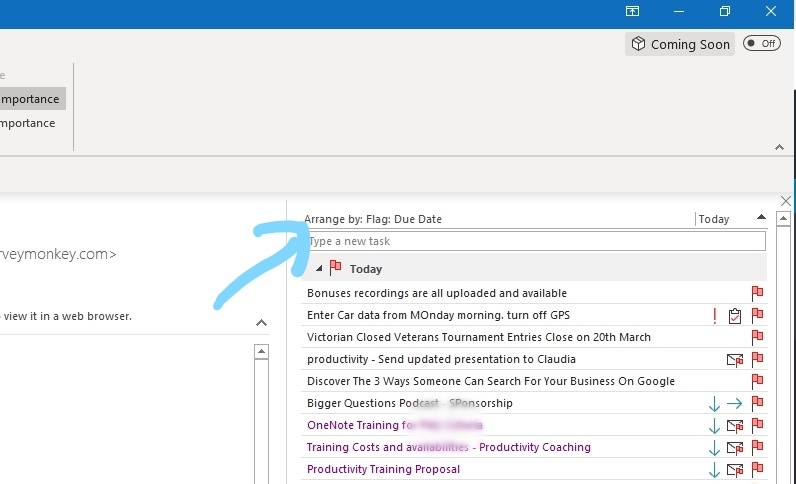
Your To Do Bar should now look like mine below.

Any Email you have Flagged or Task you’ve created will be grouped by the Due Date you set.
It’s super-easy to change your Due Dates too. Simply Left Mouse-click on the Due Date on any item to reveal a drop down box. Select the Drop Down Box to reveal a monthly Calendar from where you select the date. (See below)

You can even Left Mouse-Click on any item and drag it down or up to a different day and the date will automatically change.
I trust you can see the value of organising your Outlook To Do Bar this way. It’s a powerful way of ensuring you can view your Tasks along with your Emails or your Calendar Appointments/Meetings.
Geoff Prior – Lingford Consulting, March 2019
Workload & Email Management Training/Coaching. MBTI Consultant
Learn to use Outlook Tasks (On-Demand)
See our Productivity with MS Outlook Training here. Optimise Outlook and save valuable time!
Andrea
Posted at 20:17h, 15 MayGreat article!
The to-do bar is a life-saver! I have set this up including start dates and included outlook categories (ATM it’s a bit of a wild ride with too many, unfortunately, needed, categories), but it’s satisfying to see all those little lines disappear one by one as I polish them off. Definitively can advise using this! 🙂
admin
Posted at 20:23h, 16 MayGreat to hear that Andrea…I love it too. So many way s to customise this list too!