

04 Jul 2025 Flag emails you send in Microsoft Outlook
Flag emails you send in Outlook and follow up using your To Do Bar
Recently, I received an email from a client who recently undertook some Outlook training with me. This was her question: “Do you have a tip on how to keep track of an email you have sent to someone and are waiting on their reply?”
In her current workflow, as she described it, she would send the email with a BCC to herself so that the message showed up in her inbox while she was waiting for a reply. Sound familiar? I’ve heard that one many times before. However, there is a far more efficient way of doing this that won’t leave your inbox crowded with idle messages.
The power of flagged emails
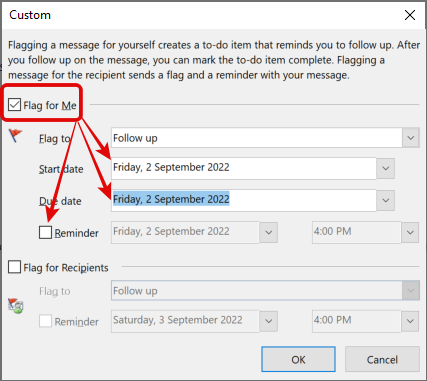
There is a powerful follow-up system right at your fingertips within the Classic Outlook – one that won’t leave you with congestion in your inbox. So how does this work? Before you send your email, insert a Follow Up flag as shown below. You have various options for when you’ll be reminded to follow up. The default options are: Today, Tomorrow, This Week (meaning Friday this week), Next Week (meaning Friday next week), No Date or Custom.
 Choosing the Custom option allows you to choose exactly which day you intend to follow up. This becomes important, as you will see below. (By the way, the flag you choose won’t be seen by your email’s recipient. It is for your eyes only.)
Finding those flagged emails you have sent
Having applied a flag to some emails, the next step is to have a process that ensures you can easily find those emails when you need them or even better, keeping those emails you have flagged visible. There are two main options for ensuring that your flagged emails don’t get lost.
Option 1
The first option is to periodically go into your Sent Items folder and review the emails you have flagged. The sent items you have flagged will display in your Sent Items the same way that received emails you have flagged show up in your Inbox. That is, they will display a small flag in the Flag Status column. (See below)
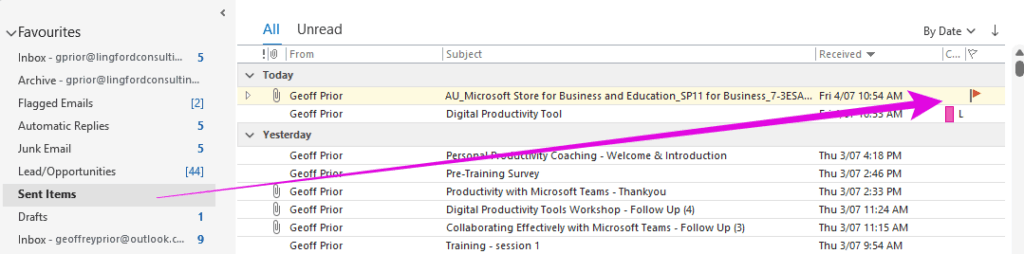
Though I see many people do this, it is not ideal, as you will need to remember to go into your Sent Items and view any emails you have flagged. If you forget to do that, you may miss a scheduled follow up.
Option 2
A far better option is to use your To-Do Bar in Microsoft Outlook, to track ALL your flagged emails, including those ones sitting in your Sent Items or in your Inbox actually. This is the approach I have used for many years, and is exactly what I suggested to my client of course.
Use your To-Do Bar to follow up your flagged emails
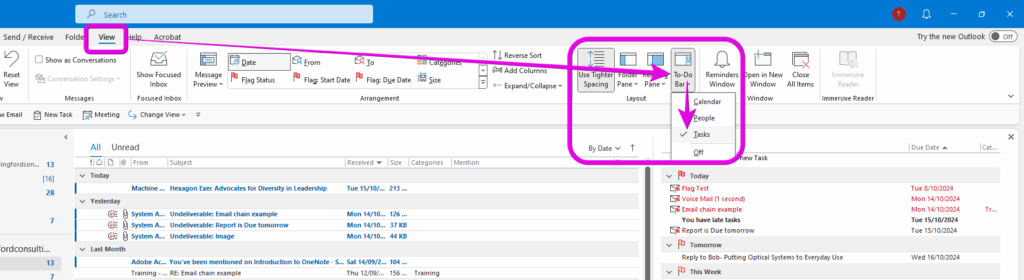
When you flag an email (whether sent or received), it automatically becomes a task with a due date the same as your chosen follow-up date. You can therefore view all your flagged emails in the To-Do Bar inside Outlook. Your To-Do Bar is displayed on the right hand side of your Inbox (see below). If it isn’t visible, select View > To Do Bar > Tasks as shown below.
When you do this, any emails you have flagged previously will appear in this To Do Bar view, grouped in date order as I will elaborate on below. If you are a big user of email flags, all those flagged emails will be shown. Quite possibly, most of them will be red, indicating the due date has passed and they have not been marked as complete or the flag has not been cleared or removed.
Just to be clear, these tasks are not copies of the corresponding flagged emails – they are effectively new to-do tasks associated with those emails. In addition, your To-Do Bar shows all flagged emails, regardless of which folder they are in (Sent Items, Inbox or any other folder) and regardless of which folder you have open on the left-hand side. And even if you move an email to a different folder, it will remain in the To-Do Bar. (Just don’t delete them!)
This means that you can even apply a an email flag to emails in your Inbox then move them out of your Inbox while keeping a view of them in your To-Do Bar to the right of your Inbox. They will always be visible! This makes it harder to forget to follow-up no matter where an email is stored.
Once this is setup, you can now access and even manage your flagged emails directly from the To-Do Bar. How? Just double-click a flagged item in the To-Do Bar and the email you have flagged will open. And itis not acopy, it is THE email you flagged. So you can reply directly from there. How good is that!
Let’s have a look at the To-Do Bar in a bit more detail, focusing on my client’s issue of flagging sent emails. Below is how the To-Do Bar would typically look.
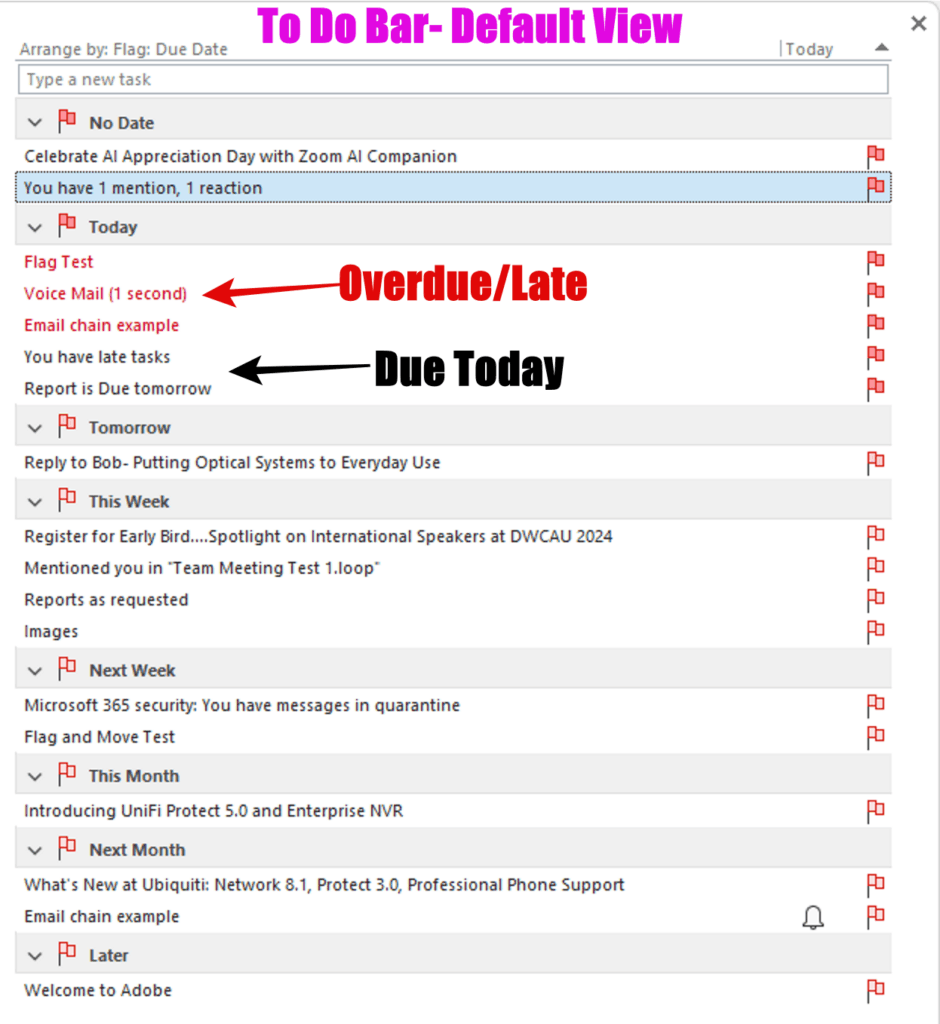
As you can see, this is the order that flagged emails are displayed by default:
- No Date
- Today (Overdue emails flags show first in Red. Then those due today appear below these in Black.)
- Tomorrow
- This Week
- Next Week
- This Month
- Next Month
- Later
Change the due date of your email flag
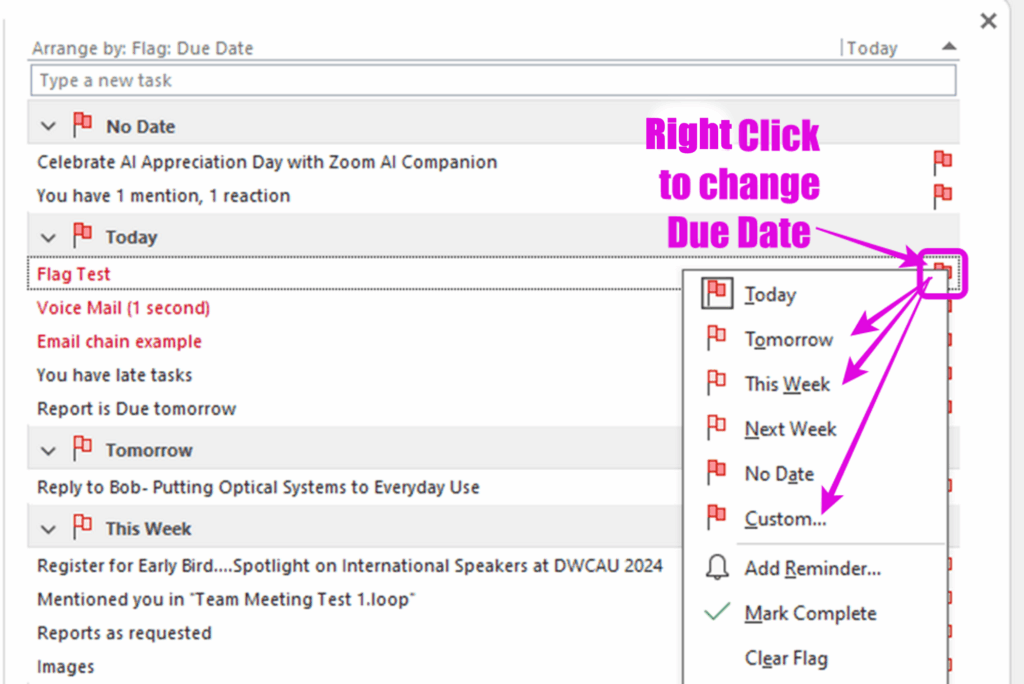
It’s very easy now to change the date of any flagged email, and therefore the order, that your flagged emails are shown in this view. Simply right-click on the flag to reveal a drop-down list from which you can choose one of a number of options.
You may not have time to follow up that email up today, or perhaps the person you sent the email to is away, so you need to wait a day of two before they return. No worries, just change the date of the flag, hit enter and the email will be reorded in your list accordingly.
You can also be more precise with the dates you choose by choosing the Custom… dialog box. Here you can choose the exact date you need to follow up. (See below)
You can even pop in your own text into the ‘Flag To’ box, renaming the email flag so that the associated task in your ‘To-Do Bar’ shows you exactly what action you need to take on this email.
Your To-Do Bar list can easily be customised further to group your flags by days or dates as I show you in this article – Customise your MS Outlook To Do Bar to manage emails more effectively.
That is, if you select a date, that date will show in your To Do Bar view as you can see below. As that article shows, you can also choose to see both flagged emails and ordinary to-do items in the list.

Final thoughts
So that’s it. Love to hear how this works for you if you choose to give it a try. Remember, this only works this way in the “Classic Outlook”. I will be writing another article for how you achieve a similar thing in the “New Outlook” another time. But as of now, it is nowhere near as efficient in the “New Outlook” as it is in the Classic Outlook when it comes to flagging emails you send to others.
Geoff Prior – July 2025
Digital Productivity Trainer
Lingford Consulting
Interested in learning more?
Do a deep dive into how to Manage your workload with Outlook Tasks
Also, check out our Microsoft Outlook productivity training here.
No Comments