
18 Dec 2025 How to use Delivery Delay or Schedule Send in MS Outlook
 Schedule the sending of an email in MS Outlook
 Schedule the sending of an email in MS Outlook
The ability to compose an email and then choose the time at which your email is sent is a great feature in Microsoft Outlook for managing communication timing. It’s called Delivery Delay in the Classic Outlook and Schedule Send in the New Outlook. It works much the same in both but with one key difference as you will see.
This can be useful in several scenarios. You may be working after hours and choose to send your email during normal work hours which is a good thing to do as it doesn’t put any pressure other people to respond to your emails outside of normal working hours.
Alternatively, it may be that the person you need to send this email to is away and rather than write this down and send the email tomorrow or risk it getting lost in their inbox, you can compose and then schedule the sending of the email so that it arrives when they’re back at work. Perfect!
In this short artcile, I’ll show you how this is done in the Classic Outlook as well as in the New Outlook.
Using Delivery Delay in Classic Outlook
To do this in the Classic Outlook, first you simply compose your email and with the email open, go to Options > Delivery Delay as seen below.

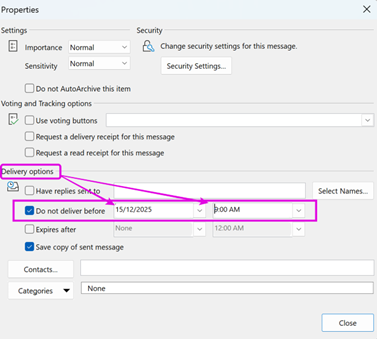
This opens the following Dialog Box. Do not deliver before will already be selected. So now choose the date and time you wish the email to be sent. Then select the “Close” button.
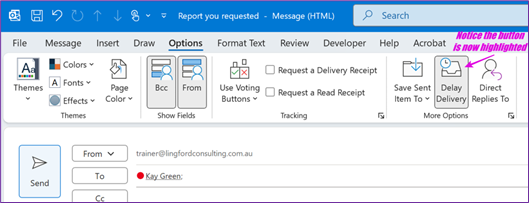
This returns you to the email and you will notice that the Delivery Delay button is highlighted indicating the delay send has been activated as seen below. You can now send the email.
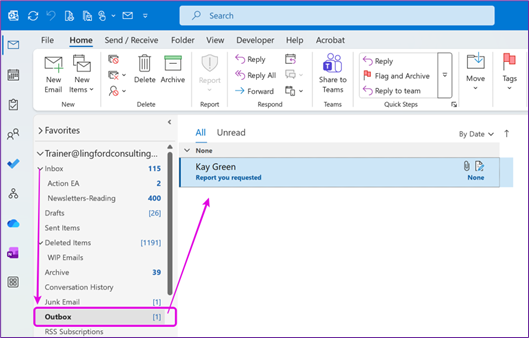
The email now sits in your Outbox as seen below.
At any time, you can open this email and alter the delay settings or even remove the delay settings to send it now. To do this, simply open the email from your Outbox and go back into the Delivery Delay options and uncheck the box.
Important Note
Microsoft Outlook must be open for your email to go at the scheduled time. If you close Outlook, you will receive a message as seen below.
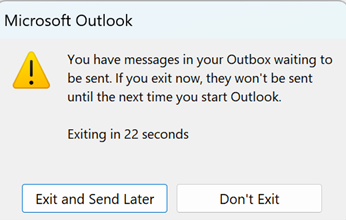
This behaviour is different in the New Outlook as you will now see.
Using Schedule Send in the New Outlook
In the New Outlook you compose your email of course and then when you are ready to send it, there are several ways to access the Delivery Delay or Schedule Send options.
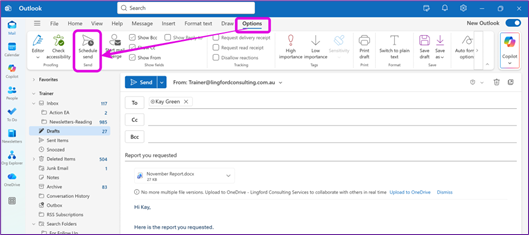
With the email open, go to Options > Delivery Delay as seen below. Accessing it this way is the same as the Classic Outlook.
But you also have the option of simply selecting the drop-down arrow on the Send Icon which reveals the Schedule Send option as seen below.
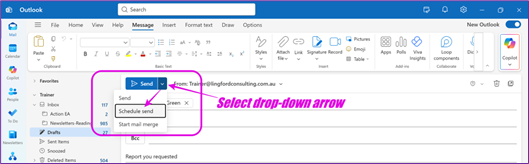
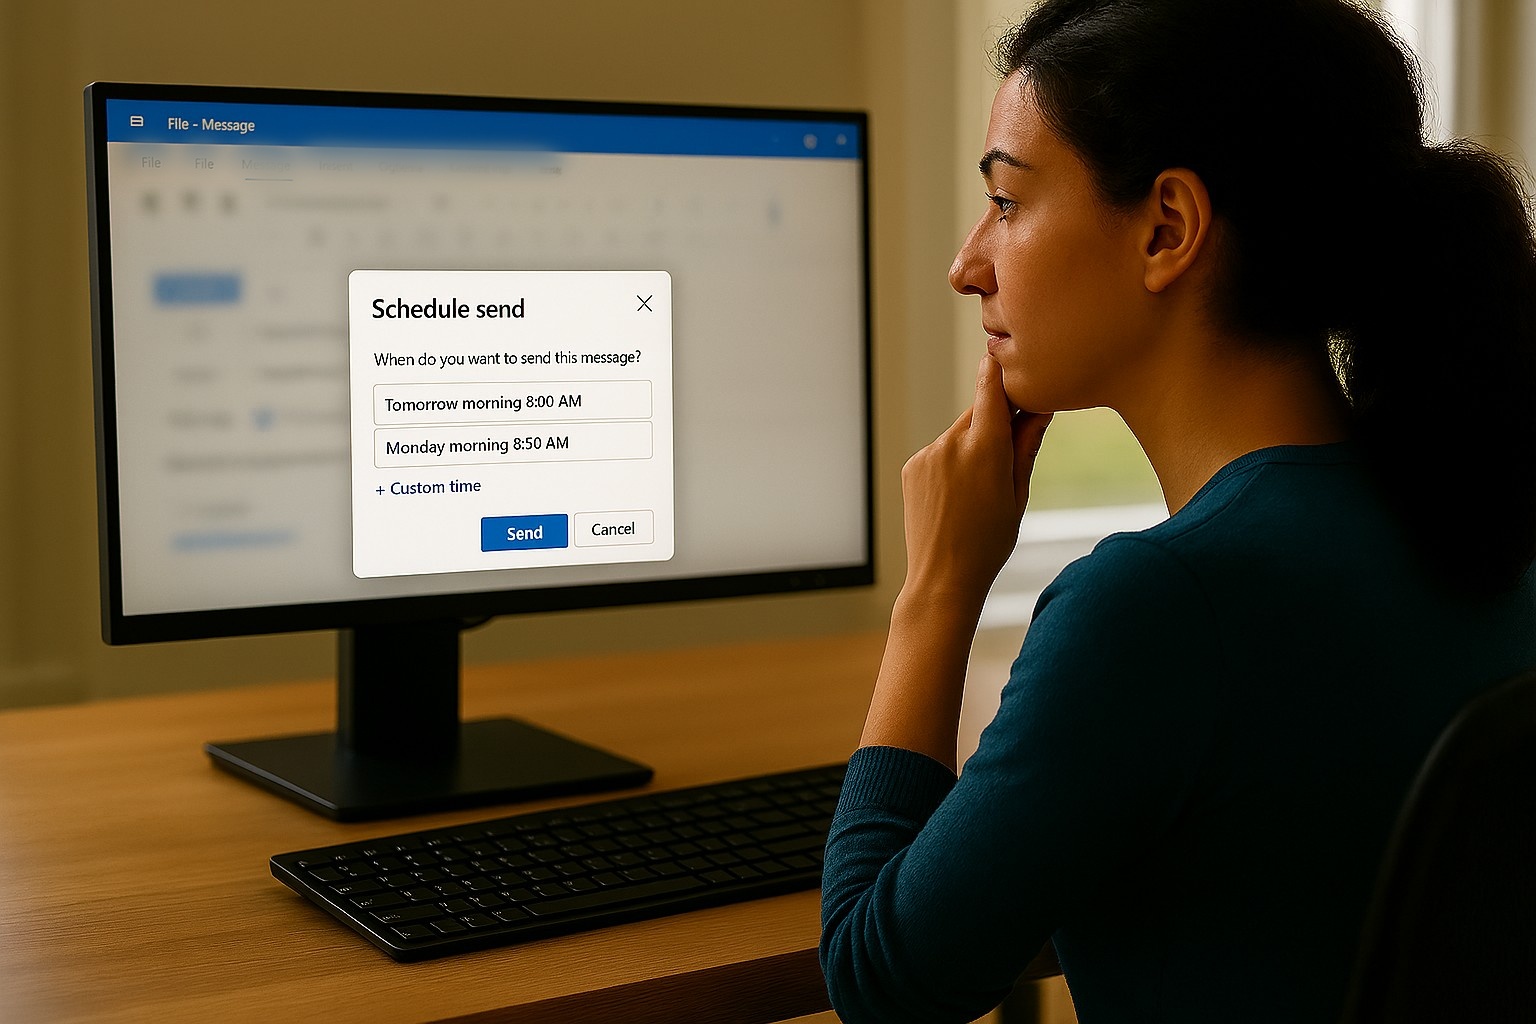
Choosing either of the above options opens the Schedule Send option window as seen below.
You can now choose one of the suggested options, which defaults to the recipients next workday (I like that) and perhaps modify the time. Or you can choose Custom time as shown below and choose the date/time you wish.
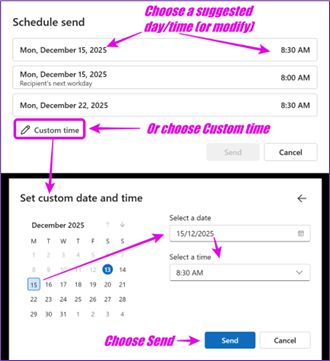
Then, send the email when you are ready.
The email will close but is now stored in your Drafts Folder (not inyour Outbox as per the Classic Outlook) It will be marked as “Scheduled” as seen below.
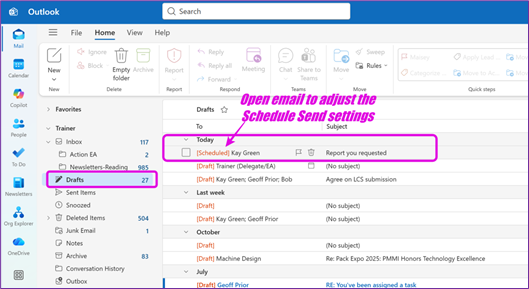
At any time before it is sent, you can go into your Drafts Folder and adjust the date/time or even cancel the Send if you wish.
In summary
What I like about schedule send the New Outlook is that the email is actually stored online, so the email will be sent at your scheduled time even if Microsoft Outlook is shut down on your device and even if your device is switched off. (This is not so with the Classic Outlook as we have already seen!)
And that is it. I’m still not convinced to use the new Outlook yet, but it is getting better and for functionality like this, I will often switch over and then switch back.
Anyway, I hope you found this helpful! It might come in quite useful over this coming Christmas period. 😉
Geoff Prior,
Digital Productivity Trainer
Lingford Consulting, December 2025
Discover more with our Microsoft Outlook training
No Comments