

19 Dec 2025 Save Time Scheduling Meetings with Outlook’s Scheduling Poll
 Save Time Scheduling Meetings with Outlook’s Scheduling Poll (Find Time)
 Save Time Scheduling Meetings with Outlook’s Scheduling Poll (Find Time)
If you’ve ever tried to organize a meeting with several people, you know how quickly it can turn into a game of calendar Tetris. Endless email threads, double bookings, and the classic “What about Thursday at 3pm?”—only to find someone can’t make it. Microsoft Outlook’s Scheduling Poll (Find Time) feature is designed to take the pain out of this process, letting you propose meeting times and have attendees vote on what works best. Here’s how you can use this feature to save yourself valuable time.
With Scheduling Poll, you can quickly propose several meeting options and let your team indicate their availability. Microsoft Outlook takes care of the rest, helping you find the best time for everyone with minimal fuss. Whether you’re using Classic Outlook or the New Outlook, this feature is easy to access and easy to use. Here is how it is done:
Where to Find the Scheduling Poll in Outlook
You will see this feature/App when you either, open a new email or a new Calendar appointment/meeting. And depending upon your Ribbon view, you will locate it here in the Classic Outlook in your Message Ribbon.
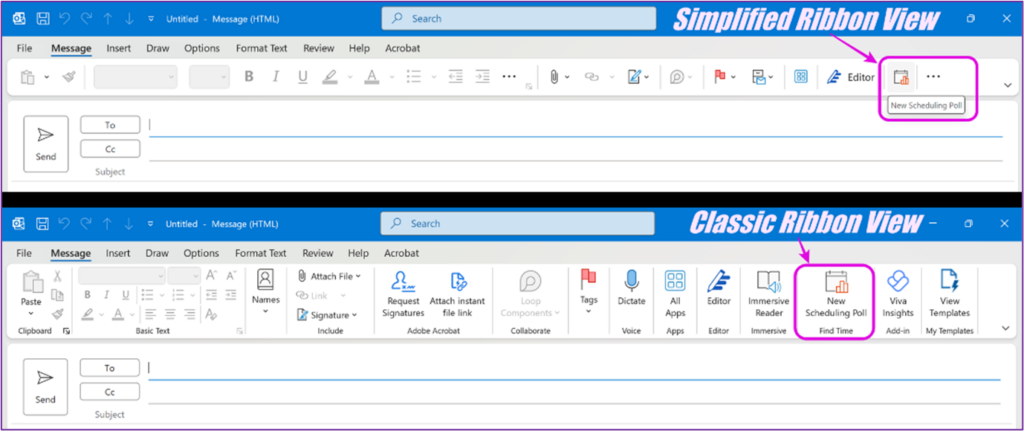
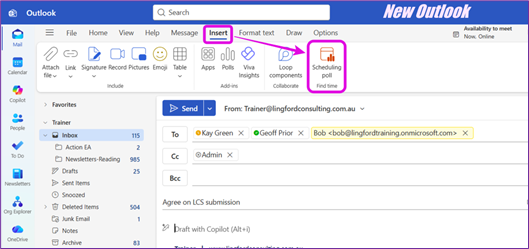
In the New Outlook, you will find this located in the Insert Menu as seen below.
Creating a Scheduling Poll
You can create a Scheduling Poll from either a new Calendar meeting or a new Email. Either way will work, but for the purposes of this article, we will use a new email to create the Scheduling Poll.
Start a new email (or meeting)
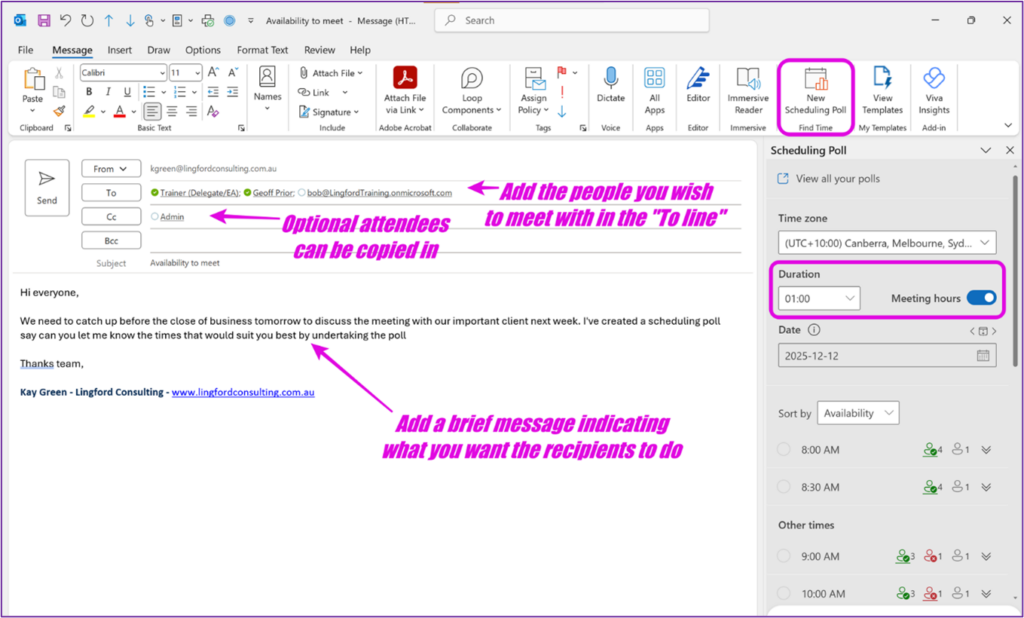
Firstly, open a new email and add your required attendees in the “To” line. If you have optional attendees, add them to the “CC” line. Include a brief message in the email explaining that you’re sending a poll to find the best meeting time for all required attendees.
Launch the Scheduling Poll
Next, select the New Scheduling Poll/Find Time feature from your Message Ribbon as seen below in the Classic Outlook or the Insert Menu in the New Outlook. This opens the Scheduling Poll Pane on the RHS of your email as you can see below.
Set Meeting Duration
Next, select the duration of your meeting. (1 hour in the above example.) The default is 30 minutes.
Select Dates and Times
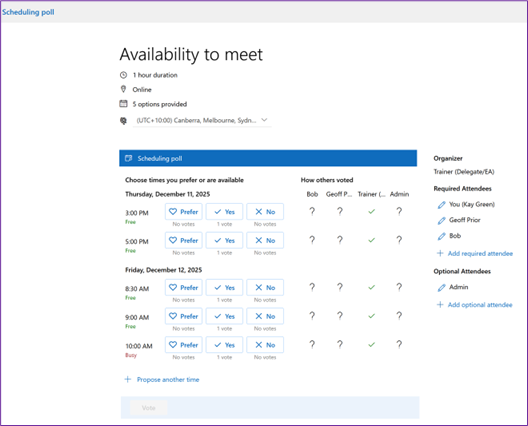
Pick the days and times you want to offer as options. You can select multiple days and several times on each day. Outlook will show you who is available (green icon) and who isn’t (red icon) for each slot.
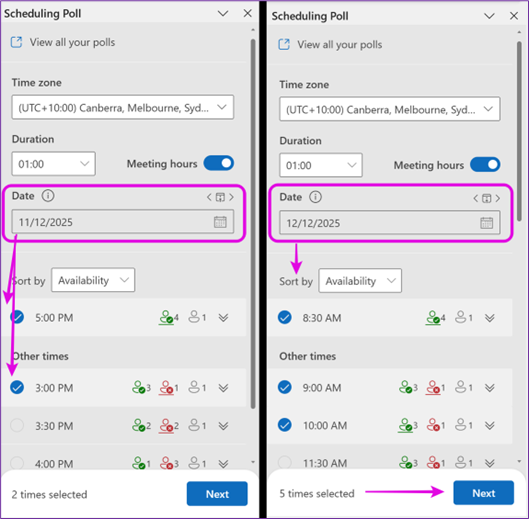
You can click the arrow next to each time to see more details about attendee availability. Note though: Availability details are only shown for people inside your organization, but external guests can still vote on the best times that suit them. (See below)
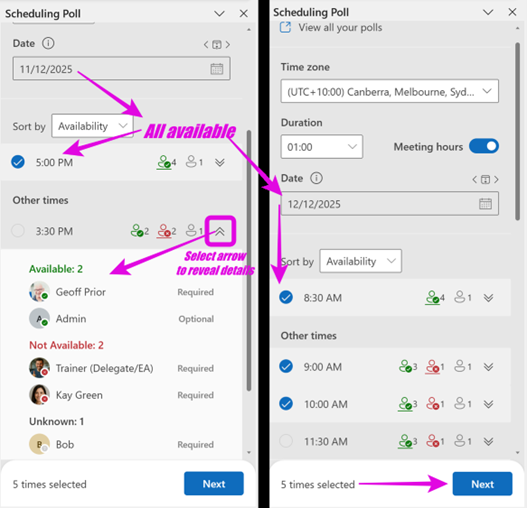
IE. In the example above, Bob is external to my organisation so his details cannot be shown. Again, the visibility of availability only works for internal people to your organisation.
When you are happy, you can select Next to manage the Poll settings.
Adjust Poll Settings
Before you send your Poll, you can expand the box to manage your Poll Settings as seen below.
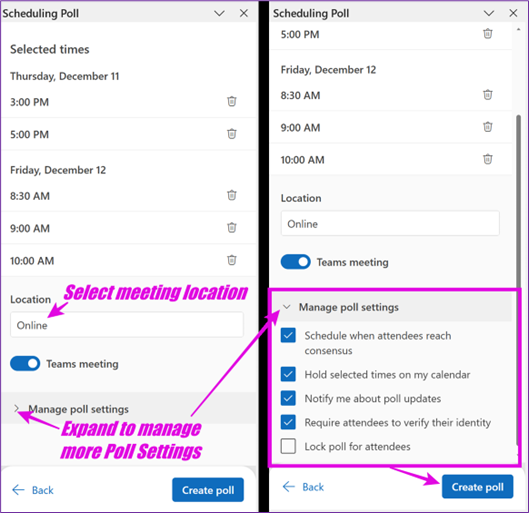
Before sending, you can manage poll settings, such as:
- Automatically scheduling the meeting when consensus is reached (your email subject becomes the meeting subject).
- Placing temporary holds in everyone’s calendar until a time is chosen.
- Notifying you about poll updates.
- Requiring attendees to verify their identity (mainly for external participants).
- Locking the poll to prevent changes.
Send the Poll
Once you’re happy with your options and settings, select “Create Poll” and send your email.
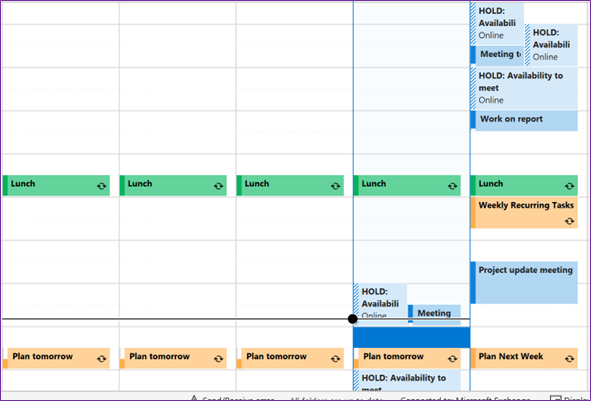
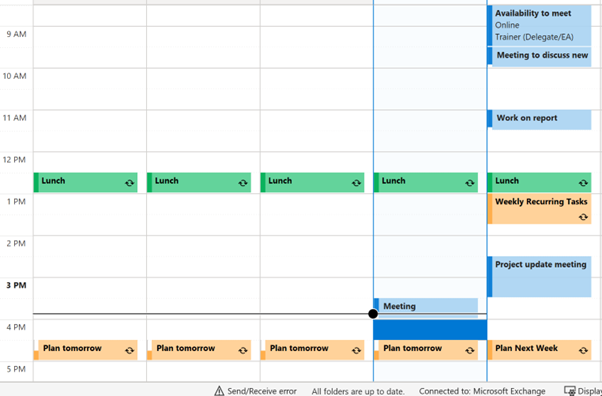
 Outlook will place temporary holds in everyone’s calendar for the proposed times as seen below. (marked as Tentative)
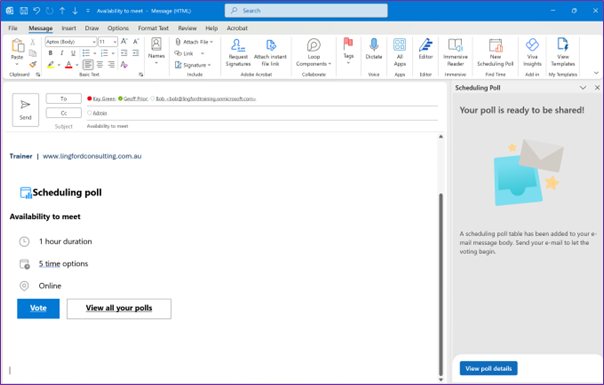
Email that Recipients recieve
The recipients will get the email seen below and will have the opportunity to open the poll and select their preferred dates/times. This is what they see: (It may open in Outlook on the Web)
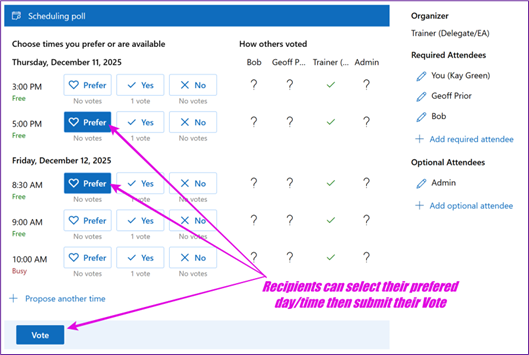
Attendees Vote
Recipients get an email with the poll and can select their preferred times. If the organizer has allowed them to propose another time, they can do that as well and perhaps even add additional required or optional attendees.
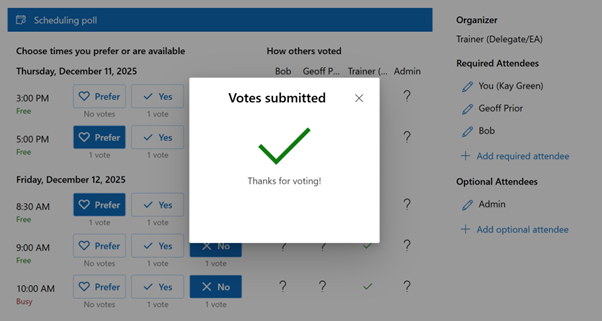
 Once they vote, they’ll see a confirmation message as shown below.
Consensus and Scheduling
The meeting organiser gets and email each time a vote is submitted. When consensus is reached, the Organiser also receives a message advising this is has happened and invites are automatically sent out.
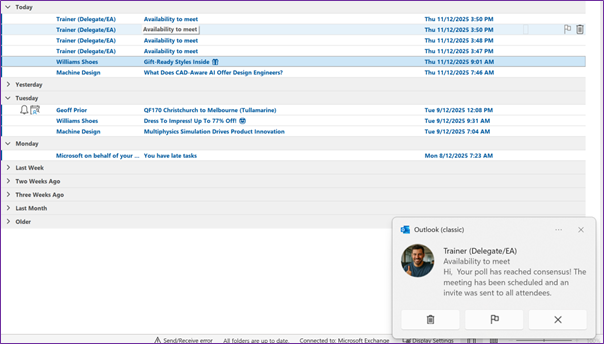
The Holds are then removed from everyone’s Calendar and only the agreed meeting time remains.
Why Use Scheduling Poll?
- Saves time: No more endless email chains.
- Reduces confusion: Everyone’s availability is clear.
- Works with external guests: Even if you’re meeting with people outside your organization.
- Automates the process: Outlook handles the invites and calendar holds for you.
If you’re looking to build a more productive team and a healthier workplace, mastering tools like Scheduling Poll can make a real difference. Give it a try next time you need to organize a meeting!
Good luck,
Geoff Prior, Digital Productivity Trainer
Lingford Consulting Services, December 2025
Discover more with our Microsoft Outlook training
No Comments